Showing posts with label refinish. Show all posts

Thursday, July 4, 2013

Buffet Makeover

 So a neighbor asked me if I wanted this old dinged up buffet and of course I said yes.  I decided to refinish the top so I sanded away, threw on some stain and wow, did she ever come back to life.  The rest of the piece I painted an antique white, distressed it with my palm sander (just quick touches here and there) and then I finished her up with some good ole polyurethane.  Oh, and I did hand paint the handles black.


BEFORE:


AFTER:


Organize and Decorate Everything

Friday, July 16, 2010

Childhood Bedroom Set

This was my childhood bedroom set and one of my first furniture makeovers....


It used to be a cherry finish with brass handles and I distressed it and filled in some of the handle holes with wood filler, then drilled single holes for the oval glass knobs.

I ended up selling it in a garage sale for $30 for both...I was a bit disappointed, at least it covered the money I put into the knobs.

Sunday, June 20, 2010

Off White

So I went with off-white with some distressing. I just popped this one up on Craigslist in hopes of selling it...I'm trying to build a fund for my patio makeover!

(not a very good) Before:


After:


I'm not thrilled with it due to the fact that the center piece is made of particle board but you never know, it might be someone's dream headboard. We'll find out!


Saturday, May 22, 2010

Garage Sale Treasure

I found this darling at a garage sale a few weeks ago, how much you say? It was $3.00!


A little TLC and she's smilin'.


Visit thecsiproject.com

Friday, May 21, 2010

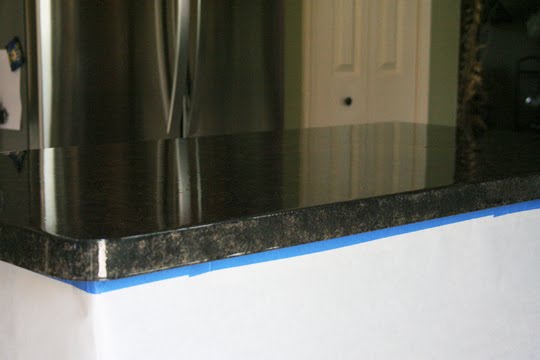
More Painted Countertop Pics...

A few days ago I posted about painting countertops, here are a few more pictures of the 'after'.


After having completed my second kitchen full of countertops I'm officially hanging my hat up with Envirotex. At least for the large projects. It was an extremely difficult product to work with. Don't get me wrong, the result is still beautiful and durable but I don't know if it's possible to get out all of the air bubbles and to get an even pour. For some reason the two inch circumference around the sink was lumpy and in some places the Envirotex didn't even take to. It could very well have been the humidity in that area but still, that's a lot of hard work to not have it turn out.

Also, if you're contemplating painting your countertops let me just tell you....it will (no matter how well you tape off your kitchen) find a way to your floor, your faucet, your stove and your fingers. And it doesn't just wipe up, it smears and turns into a sticky, hair and dust catching mess. Envirotex is better left to the professionals....in a warehouse.

SIDE NOTE:

Funny, I just saw this post on Blue Cricket Design on how to make candy necklaces by Texas Monkey...using Envirotex. This is a great idea and a wonderful way to get the most out of Envirotex. I'd highly recommend sticking with the smaller projects when using this medium.


Saturday, May 15, 2010

Painted Countertops

(Don't forget to enter the logo design giveaway while your here!)


A few months ago I painted my countertops and I've gotten compliments from everyone who's seen them, including a good friend of mine, Machele. She compared the price of granite versus diy and the diy version won by a long shot. So I went over and helped her paint her countertops. We used craft paint, sea sponges and Envirotex (ugh).

Here they are before......


During


And stunning after photos will soon follow so stay tuned!

UndertheTableandDreaming The DIY Show Off


Saturday, May 1, 2010

Patience paid off....

So I spied this dresser at the thrift store two weeks ago and it was paired with a vanity (which I didn't want) and together they were marked $60. They were new arrivals so the employees wouldn't separate them just yet so for TWO weeks I dreamt about this particular dresser and finally went back in to see if it was still there and sure enough it was. The set had been marked down to $44 and they were kind enough to separate them sooooo, long story short, they practically gave me the dresser for $24!
Yippie!!


AFTER:


border="0" alt=""id="BLOGGER_PHOTO_ID_5466483240631016386" />


Monday, April 26, 2010

Reupholstered Drop Cloth Chair


Despite my sewing machine issues I still managed to finish my chair. I did however have to wind my bobbin by hand to get the job done. Here she is in all her mod glory!


Making the World Cuter

/

The Girl Creative